‘There’s more to boating that just wearing a yachting cap. The smart skipper knows his anchors and how to use them in fair weather and foul’.
This is part 2 of our look at ‘Popular Mechanics’ articles written in 1968, as part of the A/B Encyclopedia book. While the writing style might be dated, the content is still as relevant today, as it was back then. If you’ve ever questioned the benefits of each anchor design, click through the article and find out the theory behind the madness.
Learn the ABC’s of anchoring
“If you’re going fishing in a 9-ft. dingy and want to take along a tried-and-true anchor, just tie a big rock to the line and toss it over the side when you want to stop. Such an anchor is difficult to stow and requires plenty of muscle, but it worked for the cavemen, and it still works if you don’t get caught in a bad blow. However, for anything larger than a dink, you’ll have to leave the stone age behind and use one of today’s light-weight anchors.
Modern anchor rely almost entirely on efficient hooking action instead of weight. Some of the heavier types are simply improved versions of designs going back hundreds of years; others, like the ultra-light patent anchors, are entirely new, the result of applying modern science to the ancient problem of holding a boat in one place.
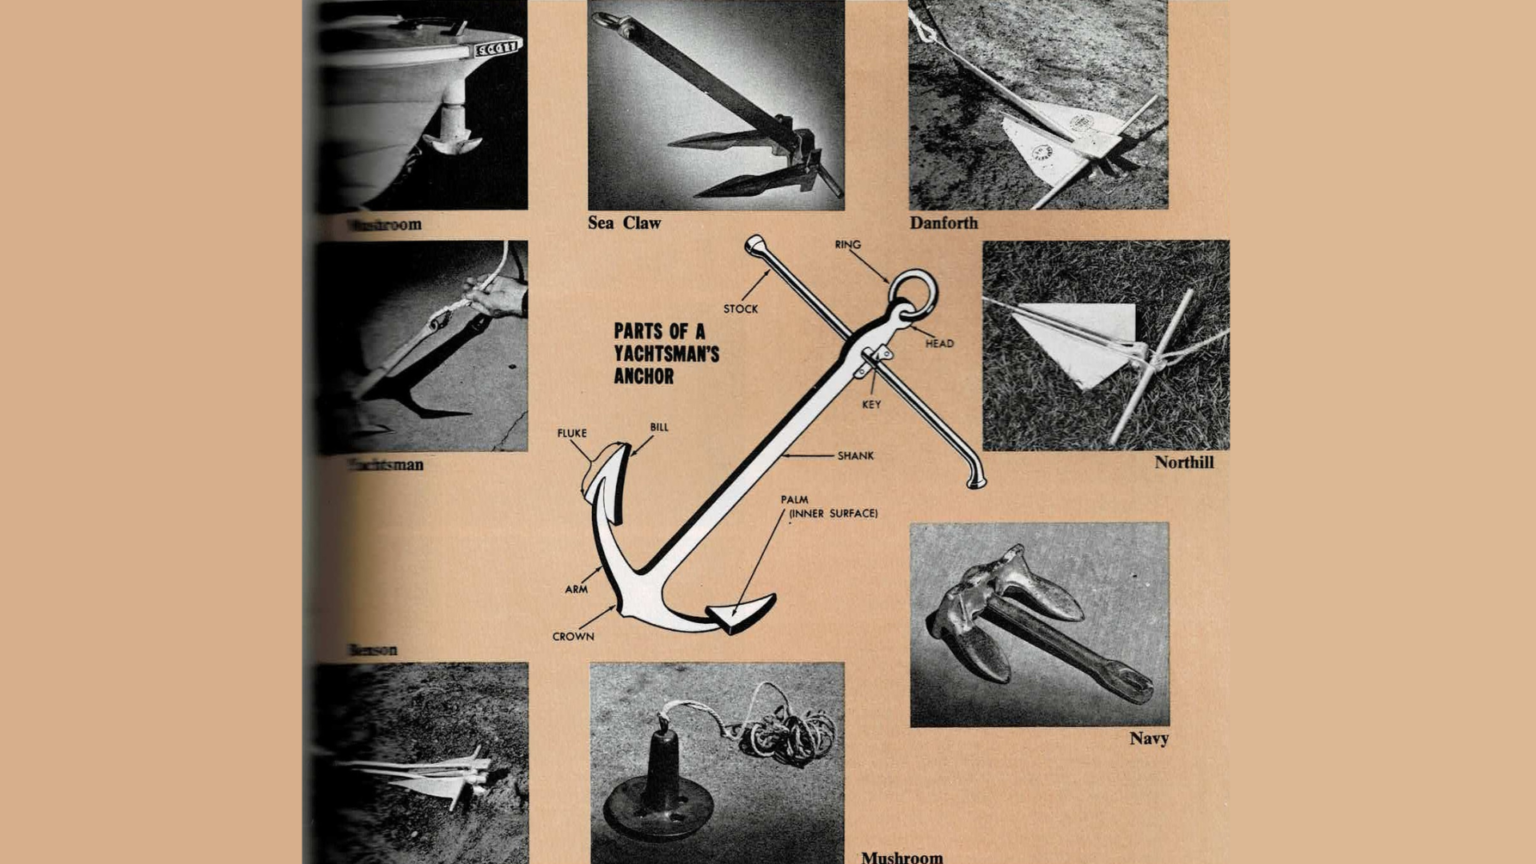
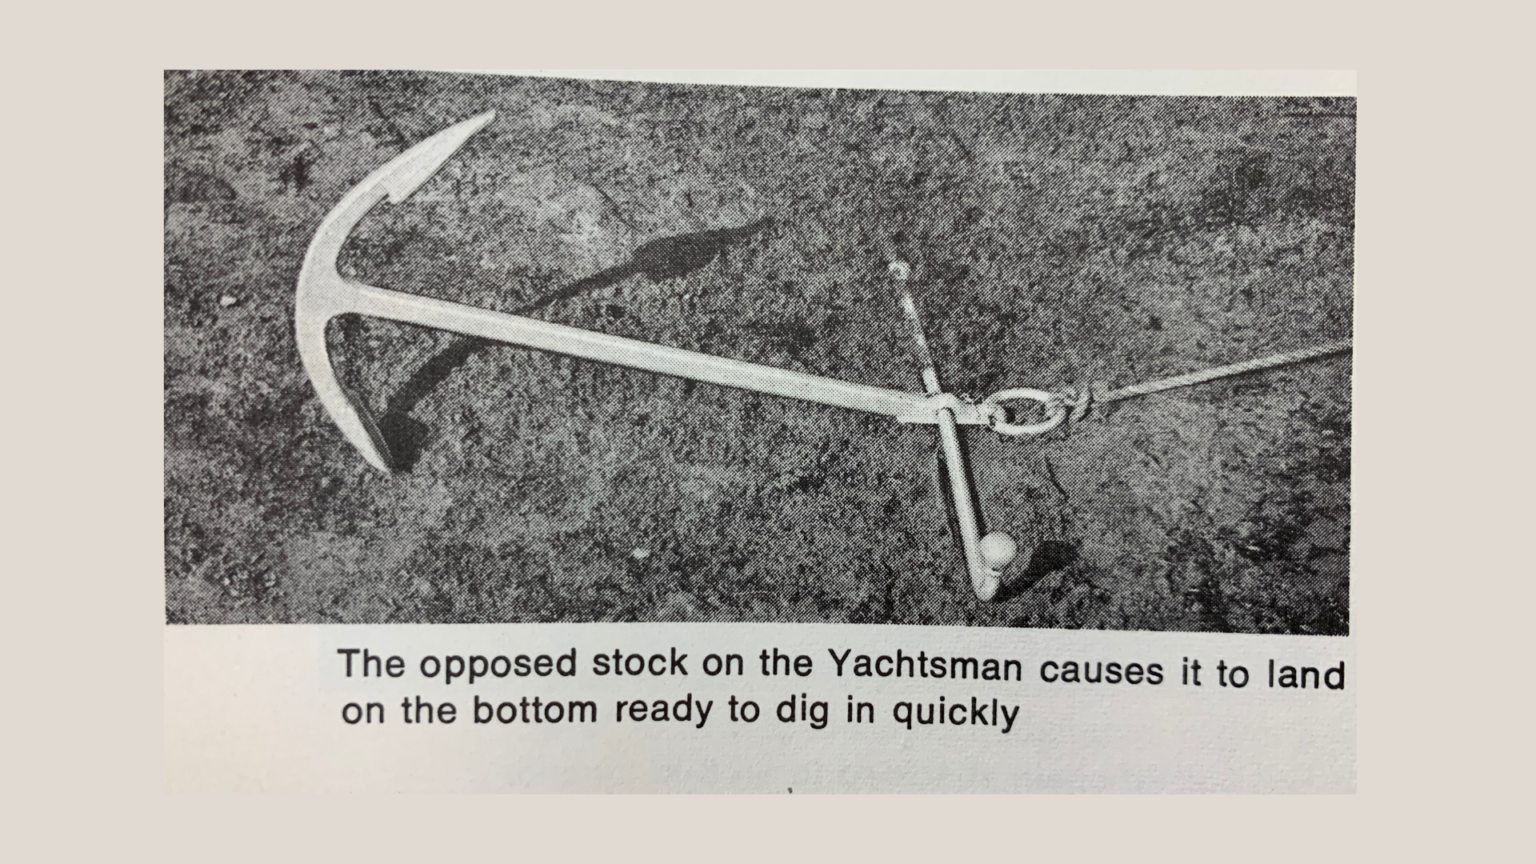
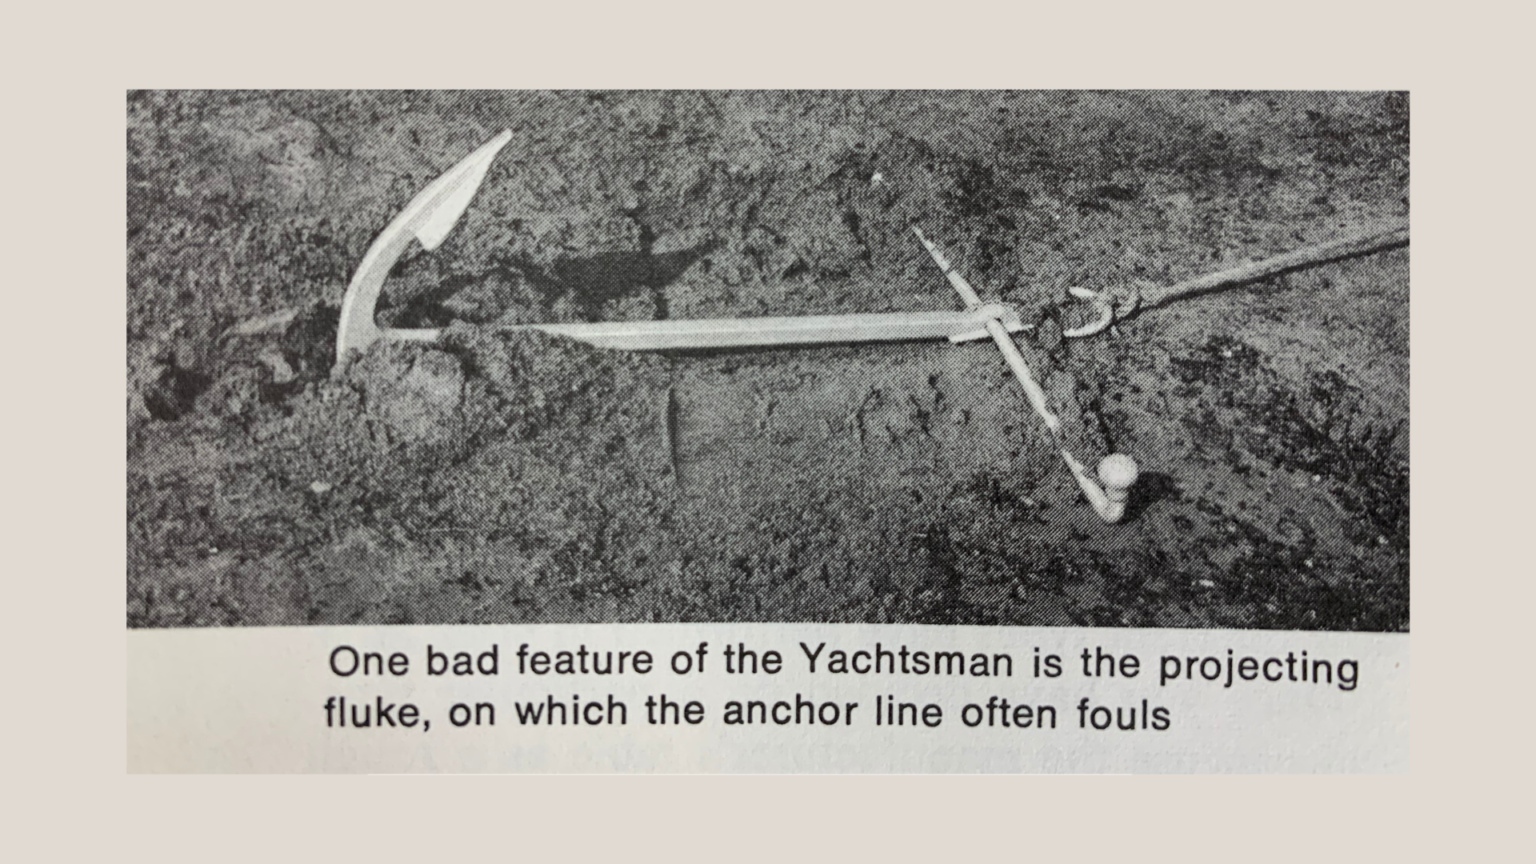
Yachtsman, or kedge, anchor is what most people think of when they hear the word “anchor”. The basic design was developed almost 2000 years ago, and it’s still one of the best for getting a quick grip in any kind of bottom. While a yachtsman is extremely heavy in proportion to its holding power in most bottoms, this extra weight can come in handy when anchoring in a rocky bottom where it’s impossible to get a good grip. It breaks out readily and with a folding stock (a relatively recent innovation) can be stowed without too much difficulty. However, it the boat swings, the anchor line can become wound around and exposed fluke resulting in a pulled-out anchor. Also, it’s a heavy and ungainly to handle in a small boat.
Navy, or stockless, anchor has been around a long time, too. Consisting of a shank with arms and flukes, it’s used on larger vessels because it requires almost no handling (the shank can be drawn right up into the hawse pipes). Once set, this type doesn’t foul easily, but getting it set on a small boat is sometimes difficult. If the bottom’s rough, the anchor may capsize before digging in, it has a tendency to dig itself out, as first one fluke comes free, the the other.
Sea claw, an improved version of the Navy anchor, has sharper flukes to achieve faster, more certain penetration. Oddly enough, this variation of the “stockless” anchor includes an opposed stock in the crown to prevent tipping. While still somewhat heavy by present-day standards, and hard to clean as well, this type is quite popular on larger boats.
Mushroom anchor, also an old design, is now used almost entirely for permanent moorings. It’s virtually foul-proof, but only useful in a bottom soft enough to allow the anchor to dig itself in deeply. A small streamlined version of this design is quite popular with anglers who want a low-cost anchor which is particularly effective in soft muddy bottoms.
Grapnel anchor (not shown) has four or five curved, sharp-pointed arms and holds by entangling itself in bottom growth. It’s hard to stow, fouls cable easily and is seldom used except under special conditions.
Today’s most popular anchors, the light-weight patent models, have all been developed within the last 30 years. They dig in quickly, hold like bulldogs and are easy to stow.
Danforth anchor, one of today’s most popular designs, was used on thousands of W.W.II landing craft to kedge off the beaches. Its two long flukes dig in quickly under a heavy pull and it’s one of the easiest to handle and stow.
This lightweight anchor has only one real disadvantage: when anchoring in a strong current an unweighted Danforth will sometimes “sail” down through the water at a flat angle, making digging-in more difficult. However, this can be corrected by adding a length of chain between anchor and line, a practice recommended for all anchors.
Northill looks a lot like an angular version of the yachtsman’s anchor, except that the opposed stock is in the crown of the head. This plus the angle and shape of the plowlike flukes, makes it dig in faster and hold better. However, it has the same disadvantage of holding by one fluke while the other is exposed, making it possible to foul the anchor line on this projecting arm. Northill’s twin-fluke model resembles the Danforth, but features angled fins on both sides of each fluke.
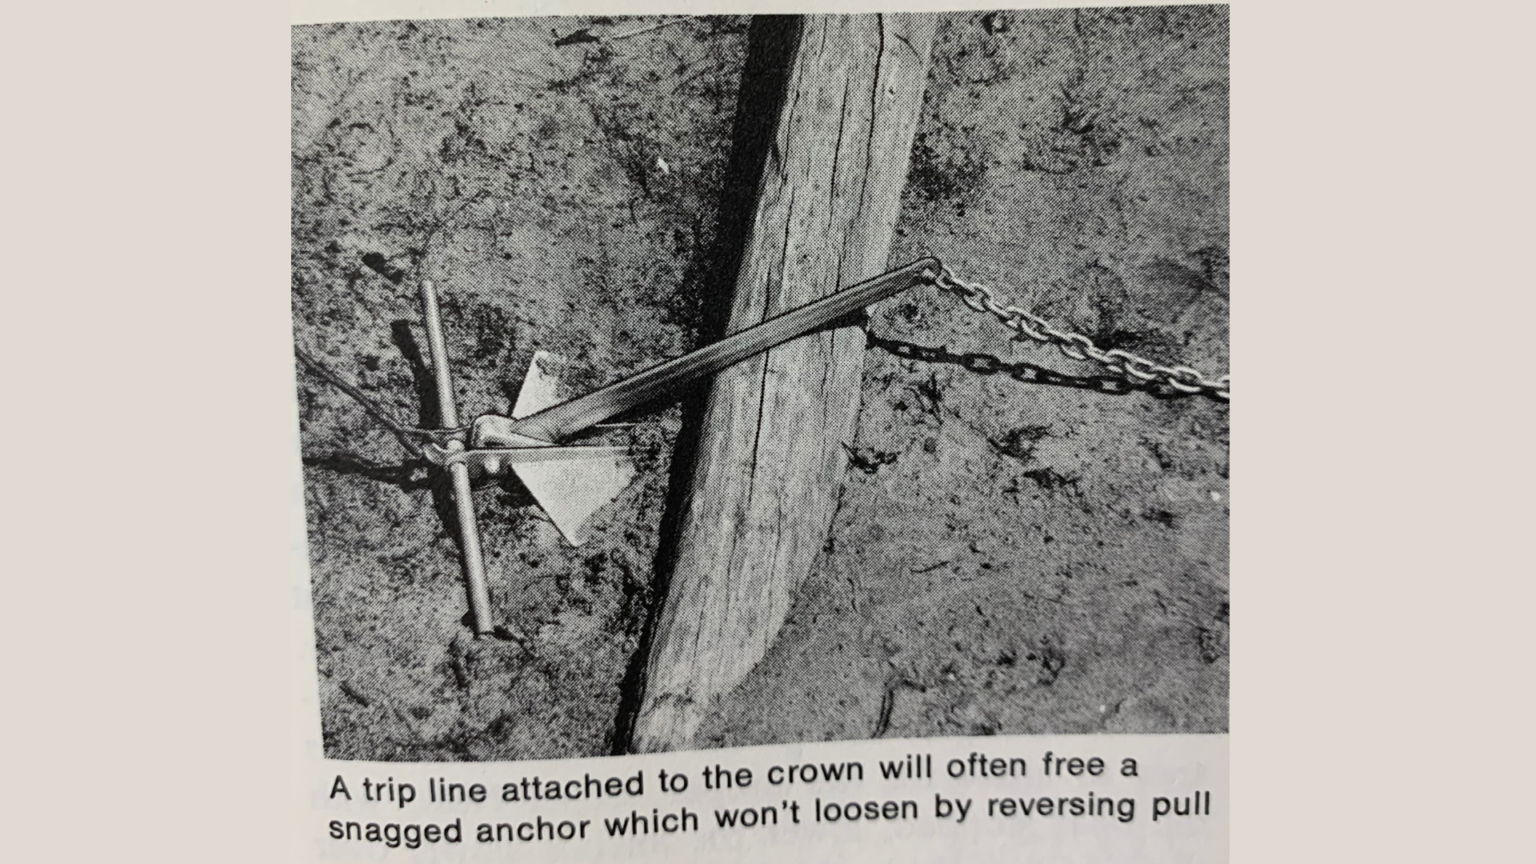
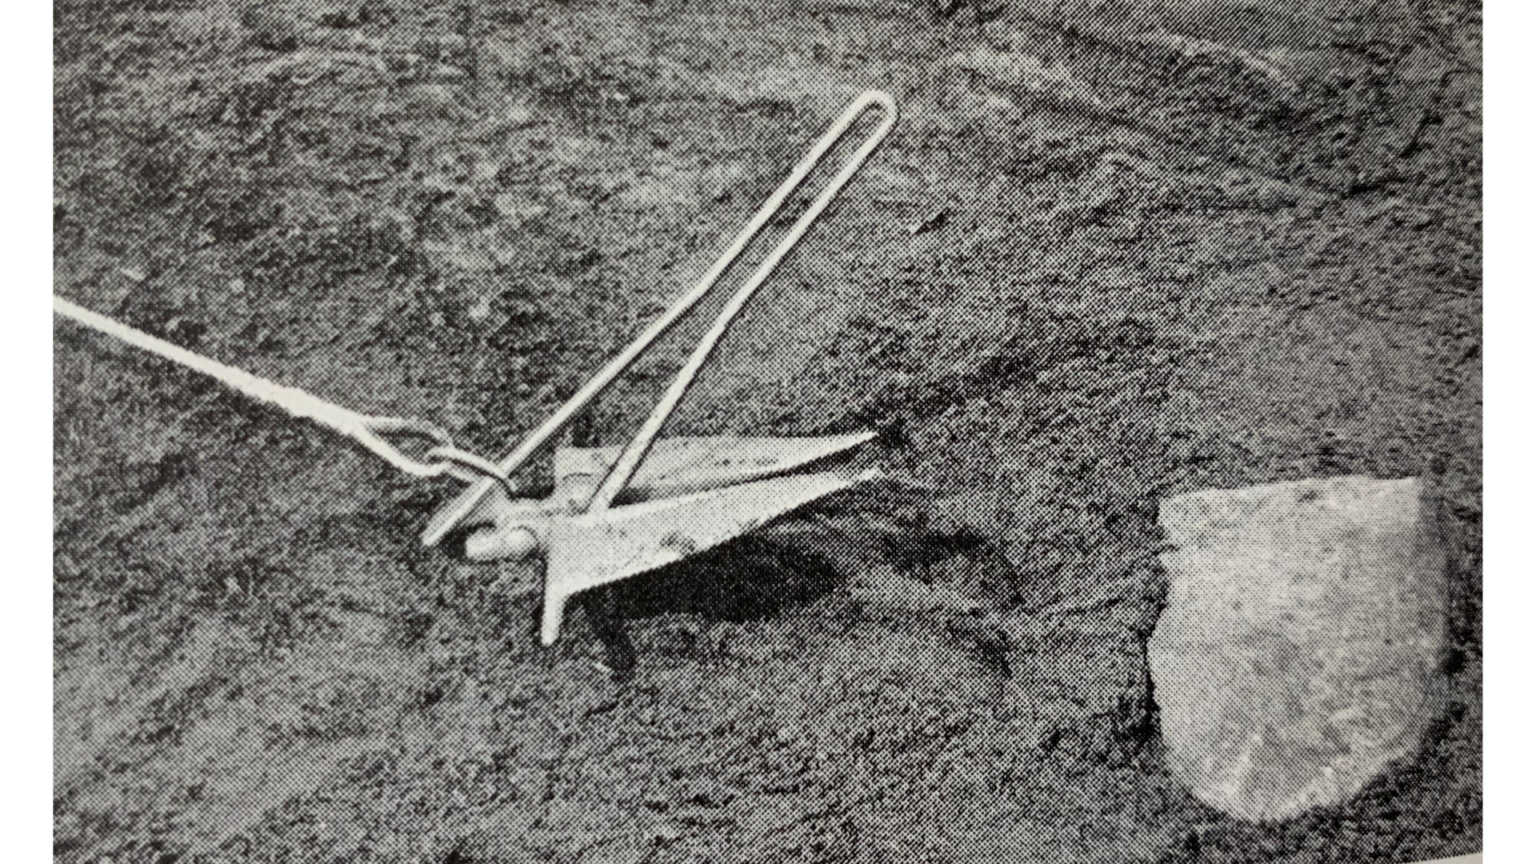
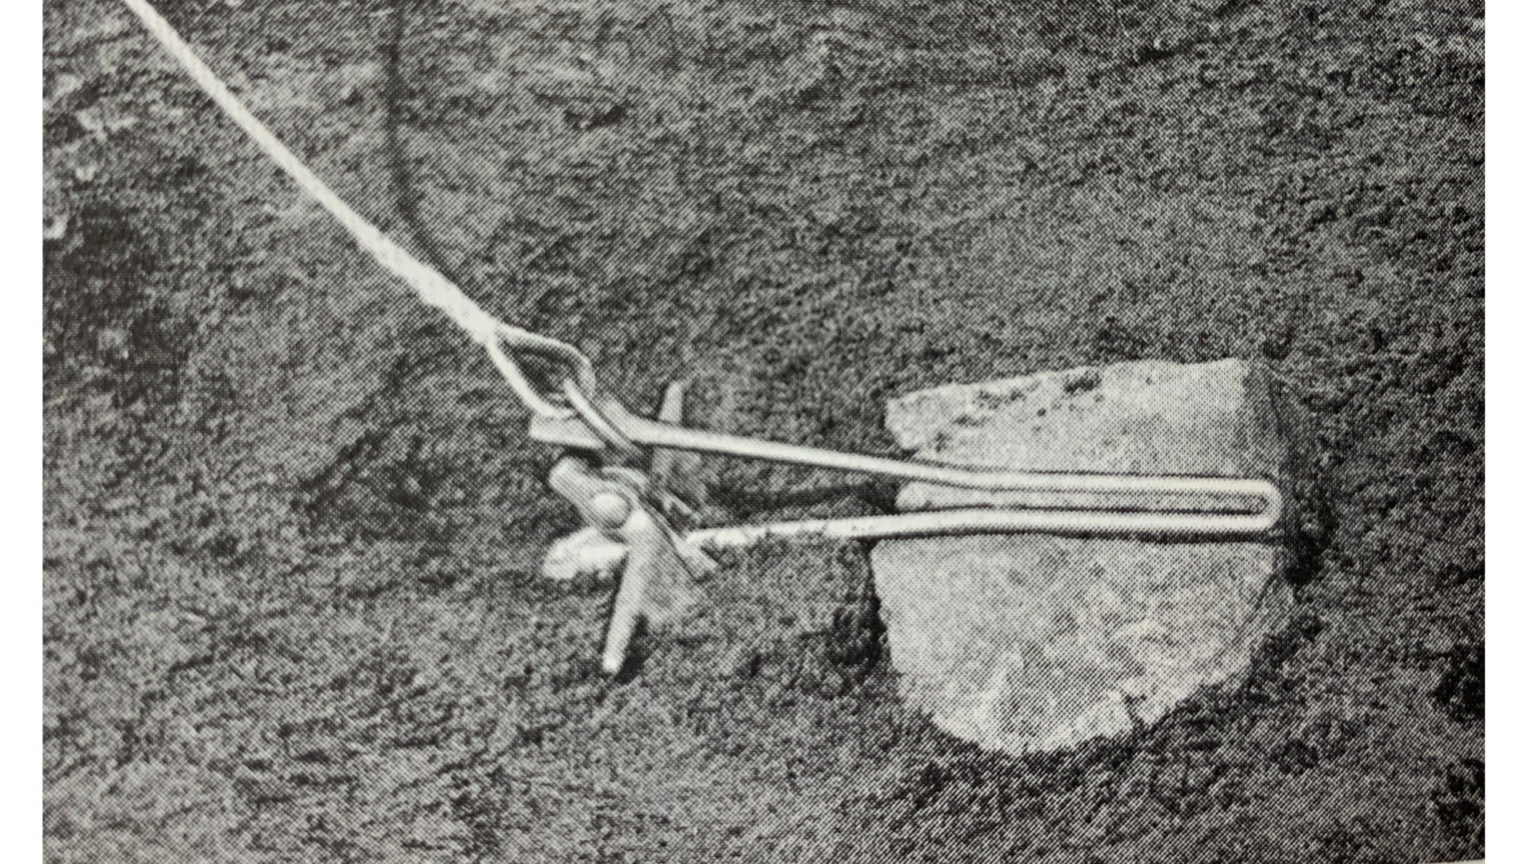
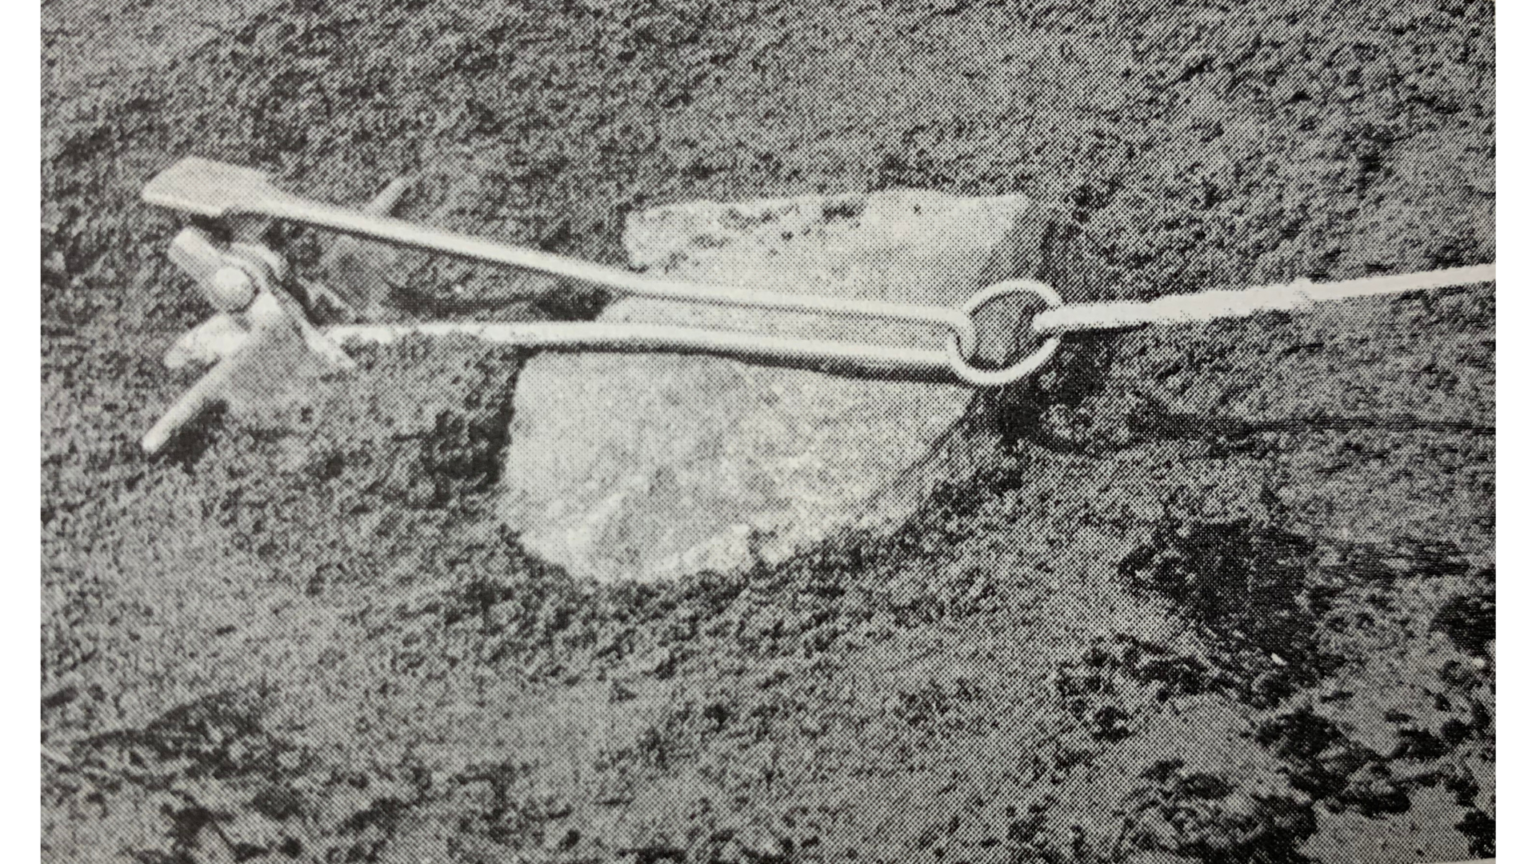
Benson anchor has a divided shank holding a sliding ring to which the anchor line is attached. If the anchor snags under a rock, etc., you just reverse the direction of pull and the ring slides back towards the crown, allowing the anchor to come out the same way it went in. Danforth’s Shearpin model accomplishes this by notching the foot and blocking this notch with a pin which will break under pressure.
There are literally dozens of other modern anchors which make use of these same principals, achieving greater holding power through the use of quick-penetrating flukes with large surface area. In addition, each design has a number of sizes.
Choosing the proper anchor for your boat is no simple task, because there are so many factors which must be taken into consideration. Have a talk with your marine dealer before deciding on a particular type. He’ll be familiar with local conditions, and can inform you as to how different types have performed in your area.
Once you have decided on a particular type, you can use the manufacturer’s table as a rough guide to finding the right size anchor and line for your boat. However, don’t rely completely on manufacturer’s recommendations since these are based on average boating conditions. You also have to consider anchorage exposure, type of bottom, shape of your hull, wind and many other things.
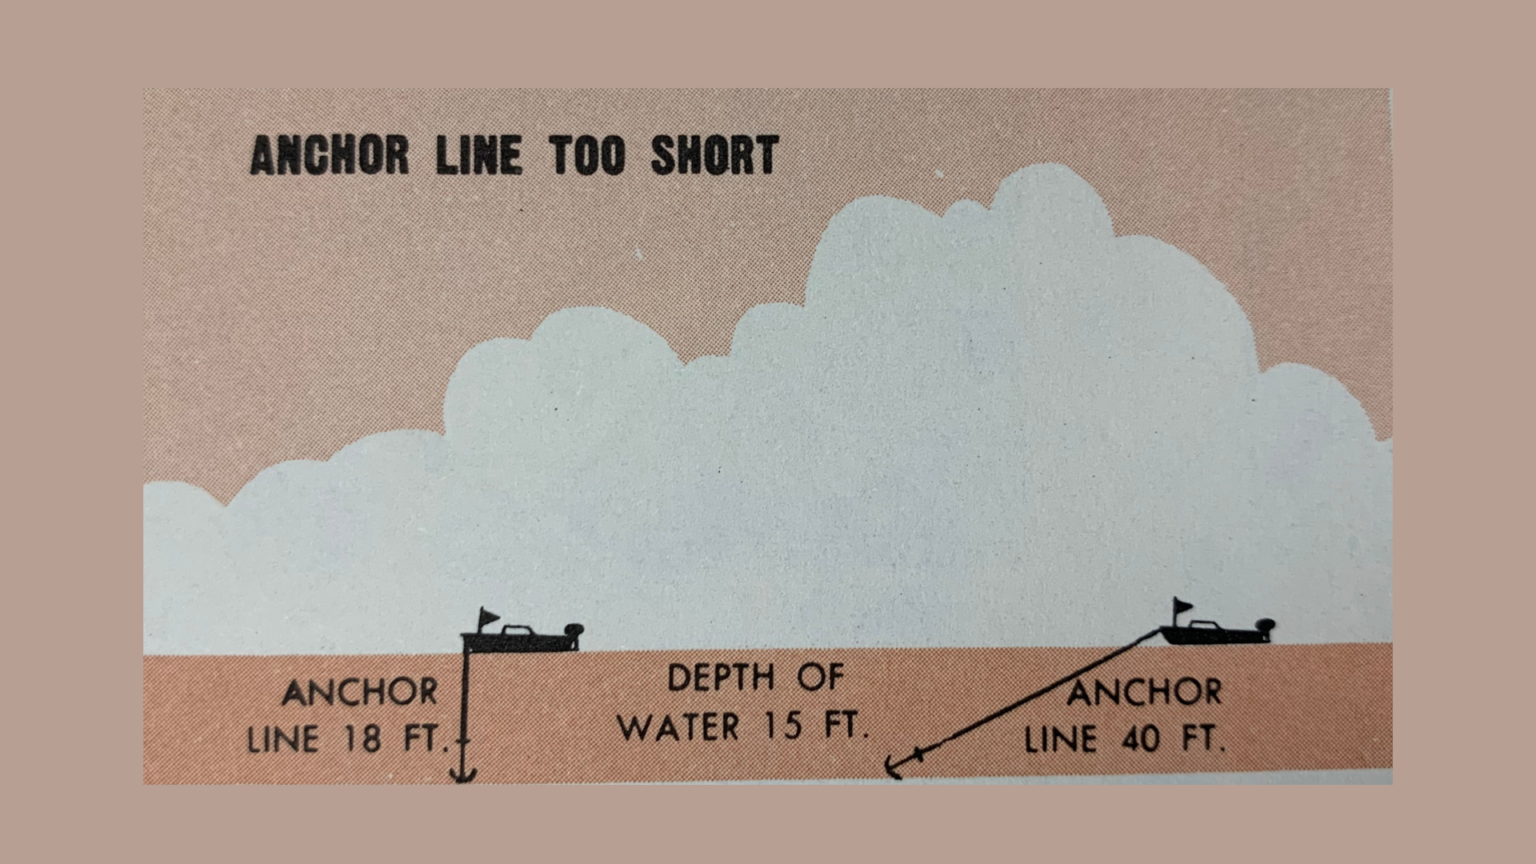
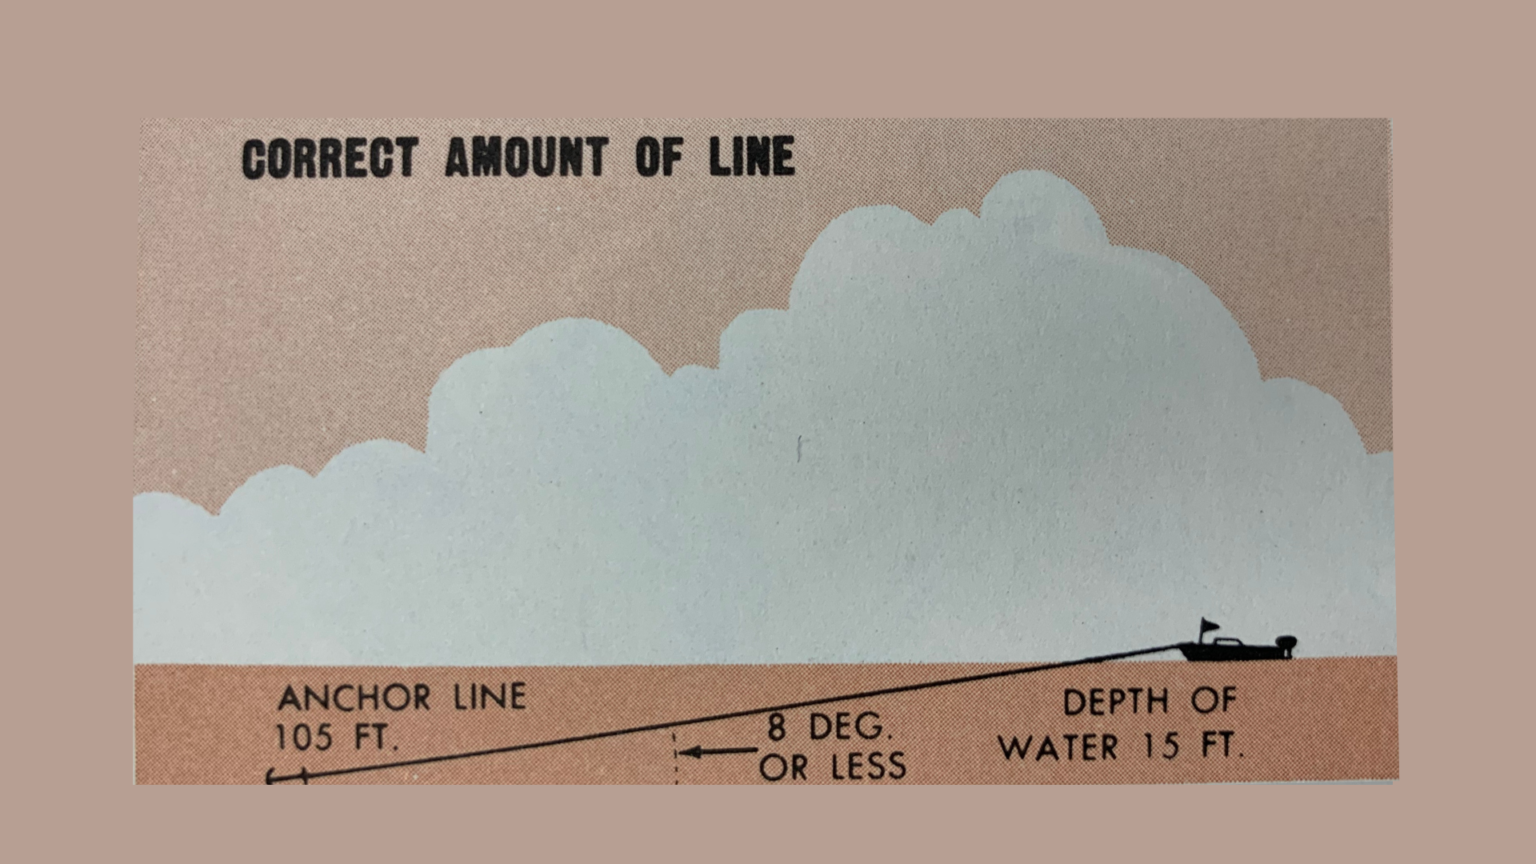
Since modern lightweight anchors get their holding power by digging into the bottom at a shallow angle, it follows that the direction of pull on the anchor line should be at the shallowest possible angle to the bottom. Double the angle and the holding power of the anchor drops by one half. Continue to increase the angle and the anchor will finally break out of the bottom altogether. This means that you’ll have to put over plenty of anchor line, or “rode,” to get the best grip on the bottom.
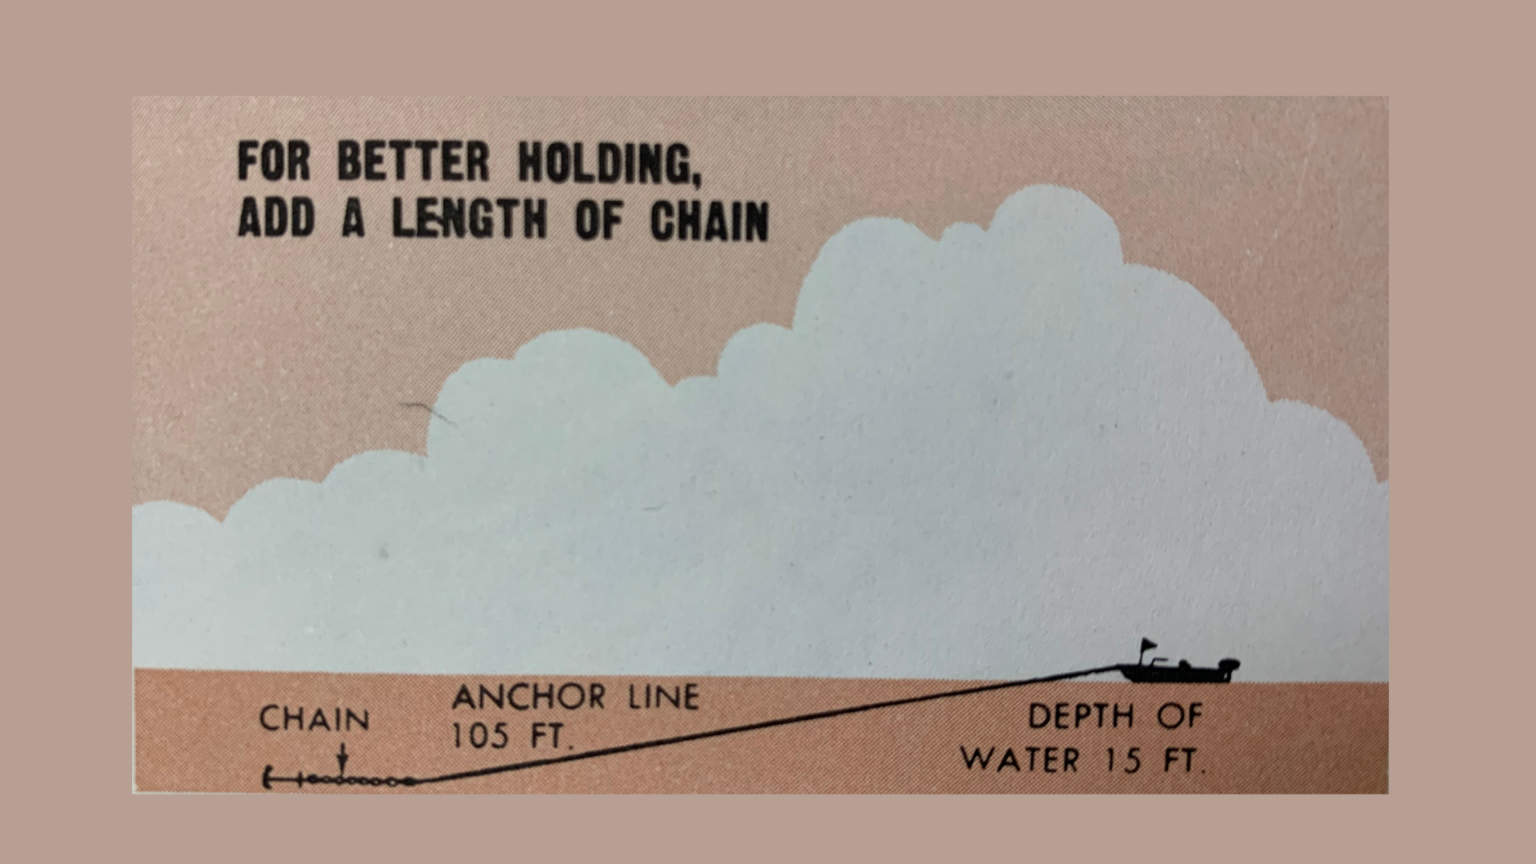
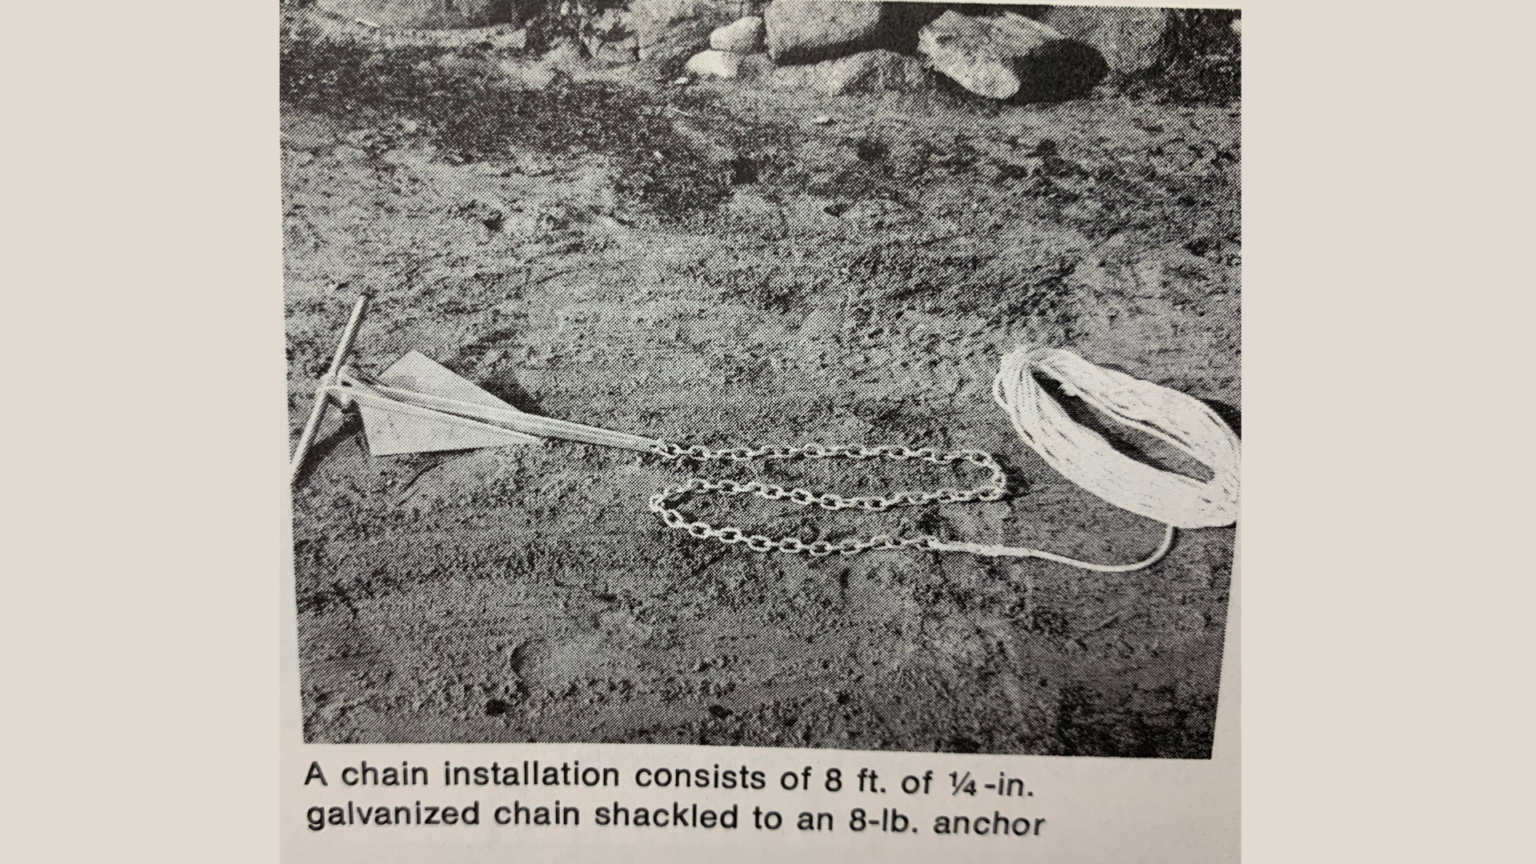
For average conditions, the “scope” (amount of line in use) should be about seven times the depth of the water; for a hard blow, increase this to ten or fifteen times the depth. However, you can cut the length of line required without seriously affecting holding power by breaking the straight-line pull between boat and anchor. On larger boats, this is achieved by running a second anchor or weight part way down the line. On smaller boats the most common solution is to add a 6 to 10 ft. length of 1/2 in. or 1/4 in. galvanised chain between the anchor and the end of the line. This will increase the holding power of your anchor under all conditions, and also cut down on anchor failure due to surge action from the boat. Many marine dealers offer a ground tackle package with anchor, chain, and line in a single unit.
You can use your anchor as a lead to check the depth of water if you mark the line at specific intervals. These markings will also come in handy in keeping track of the scope which you have paid out. Of the many marking methods in use, one of the most practical is a small dot or ring of coloured paint. Mark the first 20 ft. at 2ft. intervals, then mark the rest of the line at 5 or 10 ft. intervals. By varying the colours or number of rings, you can read the rode at a glance.
The actual process of anchoring a small boat seems to be one of the least understood operations in boating. However, assuming you have the proper ground tackle, it’s actually quite simple. First, pick the exact spot where you want your boat to be when she’s finally at anchor. Then head up into the wind or current, whichever is stronger, and go far enough beyond this spot to allow for the proper scope. Next, with the boat stopped, lower the anchor slowly over the side directly to the bottom, pay out the scope at least three or four times the water depth and make it fast temporarily. Finally, reverse the engine and idle slowly backward until the anchor digs into the bottom and stops the boat.
If you’re just stopping for an hour or two in calm water and plan to stay around the boat, this scope of three or four times the depth of water will be sufficient. However, if you plan to leave the boat unattended for long, increase the scope.
Getting the anchor up is simple the reverse of anchoring. Just run slowly up over the anchor, give the line a tug and the anchor should break free. If it’s dug in deeply, make a quick turn around the bitt when all slack is out and power ahead very slowly. If this doesn’t work, run in a tight circle around the anchor, since pulling from another angle may free it.
Choosing an anchoring site
- If you’re in a strange area, consult the chart before making any decisions.
- Choose a landlocked anchorage if possible, otherwise look for the best protection.
- Avoid the lee shore where unexpected squalls can blow your boat toward the beach.
- Give rocks, reefs, and shoals a wide berth as the boat may swing full circle in the event of a sudden change of wind direction.
- Stay away from cable areas. These are indicated on the chart and also marked by large warning signs on the shore.
- Try to anchor over a bottom which will give the best possible bite. Soft mud and clay make for very good holding, so look for spots marked “sft” or “stk” on your chart.
- Steer clear of rocky bottom, hard sand and heavy bottom growth (eel grass, etc.) where the anchor might get fouled. If forced to anchor in such places, always use buoyed trip lines.
- Never anchor in channel or waterway, or near enough so your boat could swing into traffic.
- Check the level of tide if any and make allowances when figuring scope.
Anchoring tips
- Never heave an anchor over upside down. The anchor may fail to bite, and the line will snag.
- In a real blow, let out every bit of line you have aboard, provided you have space enough to do so without danger.
- After setting the anchor, take a cross range on nearby shore objects and check after 15 min. to make sure you aren’t dragging.
- Never attach a line to an anchor with a knot; use an eye splice with a thimble.
- Any pleasure craft over 25ft. should carry two anchors – a service anchor for normal use and a storm anchor which can be put out to provide extra holding power in a big blow.
- Don’t leave a releasing anchor (Benson, Danfoth, Shearpin) unattended for long periods of time as sudden change of current or wind can release it.”
The subject content of this article belong to Popular Mechanics – All Rights Reserved.
Final thoughts
Initially, I was reluctant to read the article, much less post about it. My concern was that the content would be uninteresting, or downright boring. As it turns out, I was wrong…
My key takeaways were setting the proper scope of the anchor line and the process of breaking away a stuck anchor. Being someone that historically tossed an anchor into the water, and allowed my movement to determine when it was properly ‘set’, I can definitely see the advantage of following the proper process. This is especially true when anchoring in strong currents, like when prawning in my local channel.
Beyond the practical applications of this information, one thing this article has solidified in my mind was the benefit of sharing information. It just goes to show that a well-thought-out article – regardless of subject matter, can still be relevant and useful to others 54 years later. For all of you experienced hunters/shooters/fishos out there, this is something for you to think about as well. Consider what information you’ve learned over the course of your life and how much easier life would have been if you were sat down and told it. Then take that knowledge and share it with others in our community.
If you aren’t a strong writer – that’s ok. Reach out to someone who is and encourage them to help you out. If your friends aren’t able to, try your local club, or reach out to us – at Oz Fish and Game.
Not only will this cut the learning curve for newcomers, it will allow others to easily transition into our way of life. The result will be more members to influence political decisions and safeguard our chosen activities. Think of it as collaboration instead of competition. We cannot lose by taking this approach…

